
from Shutter, by Lewis Collard
Not bad for free, don't you think? I shot this with an ancient, beat-to-death digital SLR, a lens I got for free, and a few other things I had kicking around. If you think this looks OK, then read on. Here's how you can get half-decent product product photographs without spending a penny. I'll also give you some ideas for getting even better ones while spending less than a tenner.
The short version of this is to show you a picture of how I did it and you'll probably be able to figure it out. Here's my awesome photo studio:
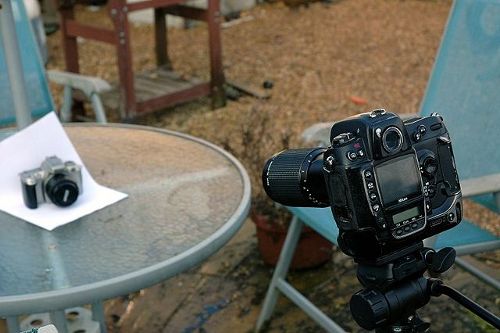
Hey, God bless you if you want to go and spend a huge ton of money on studio strobes to get great product photographs; that isn't what this is about. There's a source of soft, diffuse light that you probably forgot you already owned:
Thanks, nature! OK, that's a blank sky; of course you don't want to shoot in direct sunlight. You'll end up with dark shadows and bright highlights, but hey, I didn't want to put a boring picture of clouds there, so there you go. Head for the shade, or even better, shoot on an overcast day (admittedly, I have this easier than most of the world's population since I live in England). Those of you on or near the Equator with the sun directly overhead all the time might run into issues there, sorry!
I used some cheap LED keychains for this shot:
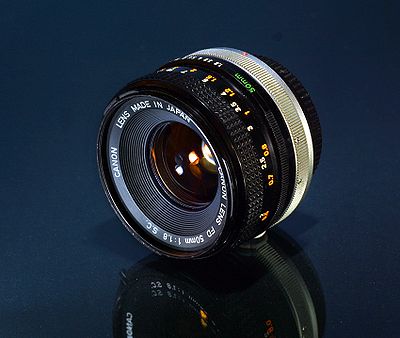
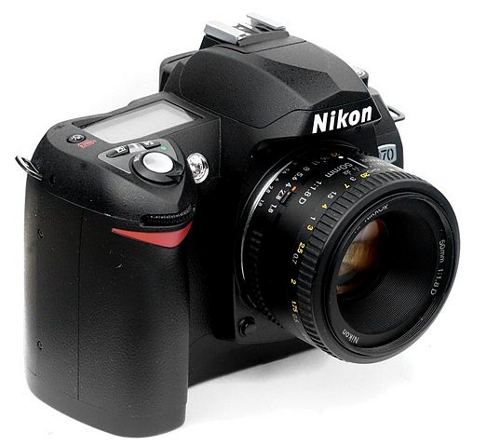
LEDs are great because they're cheap and offer you very, very precise control over your lighting. The downside is that cheap single ones have a poor CRI, resulting in a very strong blue colour cast which I'd expect is near-impossible to correct for in software, just like sodium lighting is uncorrectably orange, without drastically desaturating the image. Note the lens appears to be a weird blue colour (it's not, it's black). I splashed out with this shot by using a side window from a Vauxhall Astra to get neat-looking reflections.
If you're going to do this, you want to shoot in total darkness so that the ambient light doesn't overwhelm your little LED lights. You'll be running some very long exposures (and so a tripod is absolutely required); I believe this one was 8 seconds at f/11.
I'm sure you have a few sheets of plain paper kicking around; if you don't, raid your office's photocopier. You'll want 4 or 5 sheets to stop the background behind the paper from showing through, since copier paper isn't totally opaque.
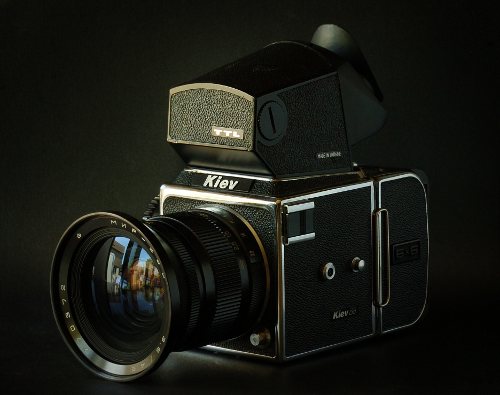
Black paper is a great way to add a more moody feel to your product photographs. Here's one I did of my Kiev 88 by window light:
Whatever camera and lens you have will work just fine, including the kit lens of your digital SLR, or your compact camera.
As for me, I don't mind taking the time to focus manually for tripod-mounted shots like this, and I like the solidity of manual-focus lenses, so I use a Nikon Series E 70-210 f/4 manual-focus lens for this kind of thing. It's sharp, and it also focuses super-close at 70mm! (I got this for free, so it fits in just fine with the title of the article. Thanks Mark!)
Here's an example of me doing it totally wrong:
Look at the reflections from the paper on the bottom left of the camera. Eww! I hadn't thought to try this before I started writing this a few months ago, but if you're dealing with dark, reflective objects (black cameras often are), and you have a polariser, stick that on your lens! If you don't have one already and have about a fiver to spare, get the cheapest, crappest one you see on eBay (under these conditions there is very little difference between them and more expensive ones; I've tried it).
Here's a boring test shot:
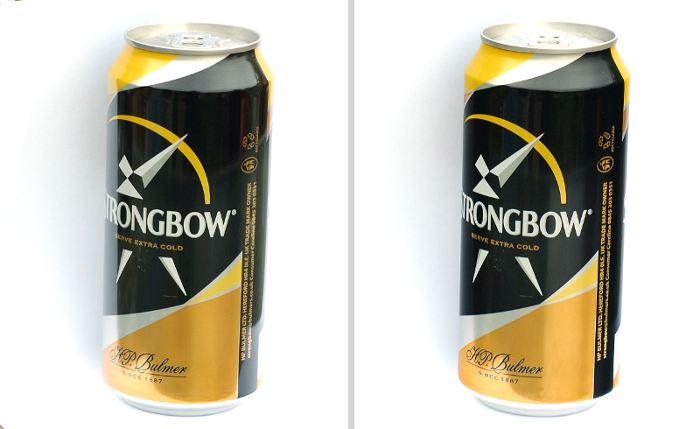
Note that it'll kill some reflections (like the ones on the left hand side of the can) and make other ones more prominent (the reflected dead fridge). I'm not sure why this is.
If you have a compact camera, you can ignore this too. Just turn off your flash and put your camera into a fully automatic mode and you'll be fine. Ignore the rest of this.
If my camera had a built-in flash, I'd turn it off (you don't need it shooting from a tripod). I turn on my self-timer, and set it to 5 seconds. I turn ISO down to its lowest setting (this is 200 on most Nikon SLRs, 100 on most Canons, and even less than that for compact cameras).
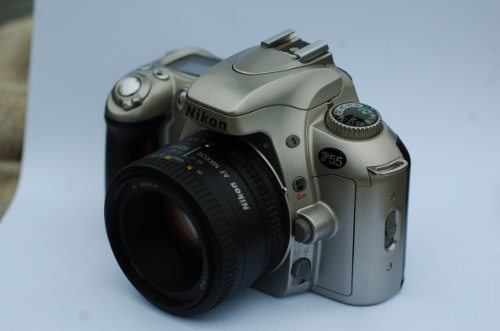
Once again, we have it a bit harder with digital SLRs, because the same laws of physics that make them blur the background far more than compact cameras, also means that we are always struggling for depth of field. For shots of quite deep items like cameras, I tend to use aperture priority mode, f/11 or f/16. Yes, that'll soften the image somewhat due to diffraction, but the softness from diffraction is relatively easy to correct with a simple "Unsharp Mask" in your favourite photo editor, whereas defocus is an extremely complicated one that (despite, I'm sure, what people who are trying to sell you Photoshop plugins would like you to think) cannot be fully corrected in software. Here's an example:

It's not so easy to see at a small enlargement, but notice how the F55's shutter button is noticeably defocused in the left-hand picture compared to the second. That's just how it is, and no amount of Photoshop trickery is going to correct that.
Of course, the smaller aperture will force a longer shutter speed, which is why I shoot this kind of thing (and very little else when I'm not carrying several kilos of Ukrainian medium format camera) from a tripod. If you don't have a tripod (you should, but telling you to go out and buy one wouldn't fit too well with "free"), then you'll have to grab whatever aperture you can grab and live with the resulting shallow depth of field. If your lens has VR, IS, or whatever your lens' manufacturer calls it, turning it on would probably be a good idea if you're hand-holding. Or just shoot any compact camera, which doesn't have this problem.
Shoot whatever you like. I shoot large, fine JPEGs because I'm lazy and because raw conversion software pisses me off, but whatever works for you. On a high-resolution camera, you'll probably see the difference between post-processed JPEGs and processed raw files if you look at them at 100% on a monitor, but then, if you're cheaping out by shooting them for free, you're probably only shooting for your website or eBay auctions, and so it's never being enlarged enough for you to see the difference.
Ignore me: use whatever works for you.
Set this to suit your conditions. I usually use "Shade" on Nikon digital SLRs, presuming it's actually shady. Cameras have different ideas about what "shade" means, so you'll have to make your own tests with your own camera to see how this goes. If "Auto" gets you the results you want, then go for it.
You can ignore this if you're shooting raw.
Shooting against a white background in overcast conditions is likely to confuse your camera. It'll see a white background, and try to expose the white background towards grey, rather than leaving it white. Here's how yucky this looks:
Those are the results you'll get if you use no exposure compensation on my camera; your camera might be different. You can't really fix this in post, either, since lightening it will pull out roughly equivalent to shooting at stop higher ISO for each stop of underexposure. You'll get this in any of matrix (evaluative), centre-weighted and spot metering modes in the real world, sorry. You'll face the same problem in the other direction (overexposure) if you're shooting with a black background against window light. Just keep an eye on your LCD; that's what it's there for.
I tend to use exposure bracketing to take three shots and then use GIMP layers and masks to paint in detail from an under-exposed shot where highlights have blown out on the normally-exposed shot. Yes, this is coming from the "HDR sucks" guy, deal with it. Shooting raw might give you some ability to recover blown highlights, too.
As I mentioned, I use a manual-focus lens, but I'd much rather be focusing manually for product shots in any case. I set my digital SLRs to use a single focus point and watch for the green focus confirmation dot.
Beware of the tendency to over-sharpen! You can see how yucky this looks by looking at the top photo in my article on the Canon A-1. I'm still learning!
Smarter people would paint out the shadows in the picture I posted at the top. I didn't, because I'm lazy.